Basic Guide: Gear Overview
Artifacts Overview
Basics
Artifacts and Accessories (Gear) are special Items that can be equipped by your Champions.
There are 6 kinds of Artifacts: Weapons, Helmets, Shields, Gauntlets, Chestplates, and Boots, and 3 kinds of Accessories: Rings, Amulets, and Banners – and every Champion can be equipped with one of each.
Individually, each piece of Gear provides bonuses to a Champion’s Base Stats.
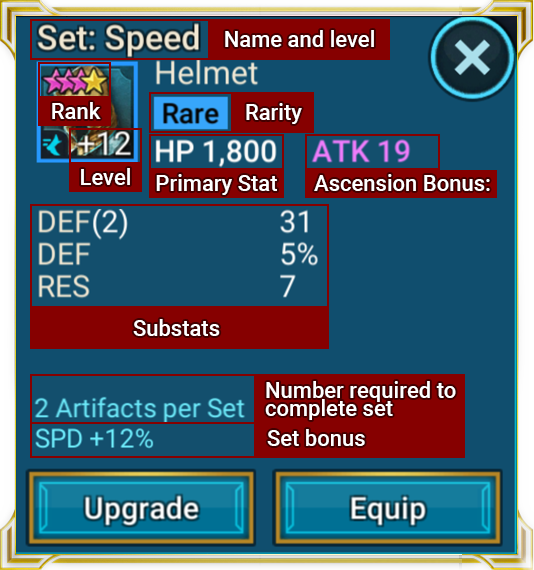
Each piece of Gear has various attributes, but some of the most important are its Primary Stat and its Substats.
Some Artifacts and Accessories have set Primary Stats, while the Primary Stats for others can vary. Artifacts and Accessories that are Rank 4 or above and at least Level 12 can also be Ascended. This grants them an Ascension Bonus, giving them an extra stat that can be further upgraded via Ascension. See the following table to see which Gear can come with which Stats.
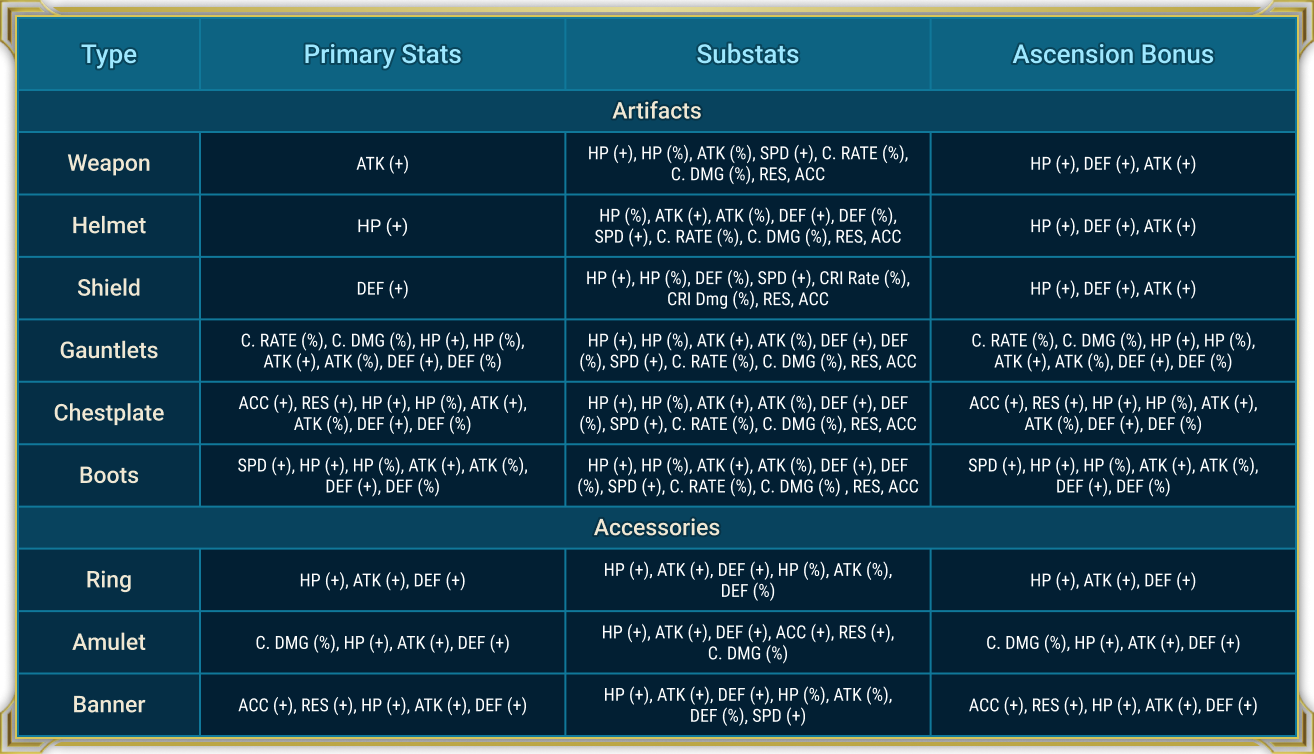 i
iBeyond the basic Stat bonuses an Artifact provides, each one also belongs to a specific Set. Some Accessories also belong to a specific Set.
Sets
When equipped with enough Artifacts from the same Set, Champions will benefit from a special Set Bonus from that Artifact Set.
Certain Artifact and Accessory Sets require different numbers of pieces to complete them:
- 1-Sets: These require 1 Accessory to complete a Set
- 2-Sets: These require 2 Artifacts of the same type to complete a Set
- 4-Sets: These require 4 Artifacts of the same type to complete a Set
- Variable Sets: These special Sets grant different Bonuses depending on how many Artifacts and Accessories are equipped - from 1 to 9 pieces
Artifact Sets can be combined with each other, meaning a single Champion can equip three 2-Sets, or a 4-Set and a 2-Set, and benefit from the Set Bonuses from each. Or, if using Variable Sets, you can mix in odd numbers of pieces and still receive Set Bonuses, too.
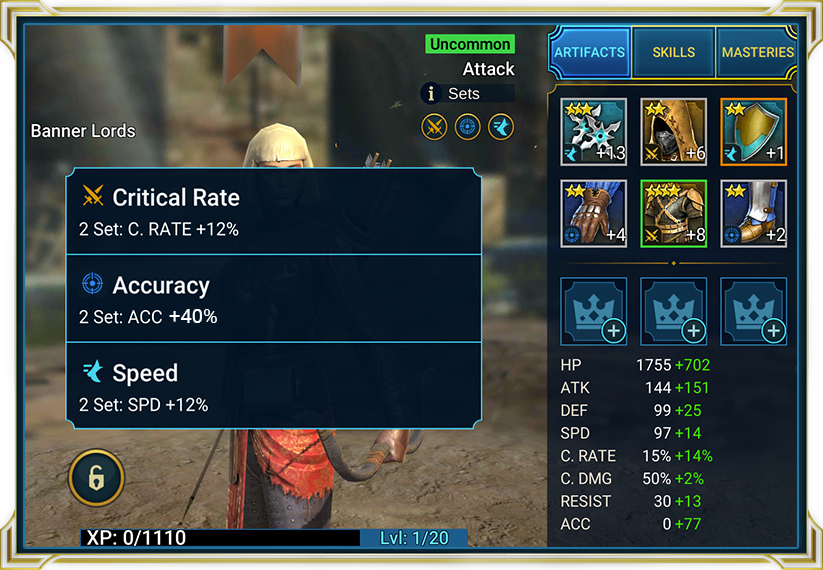
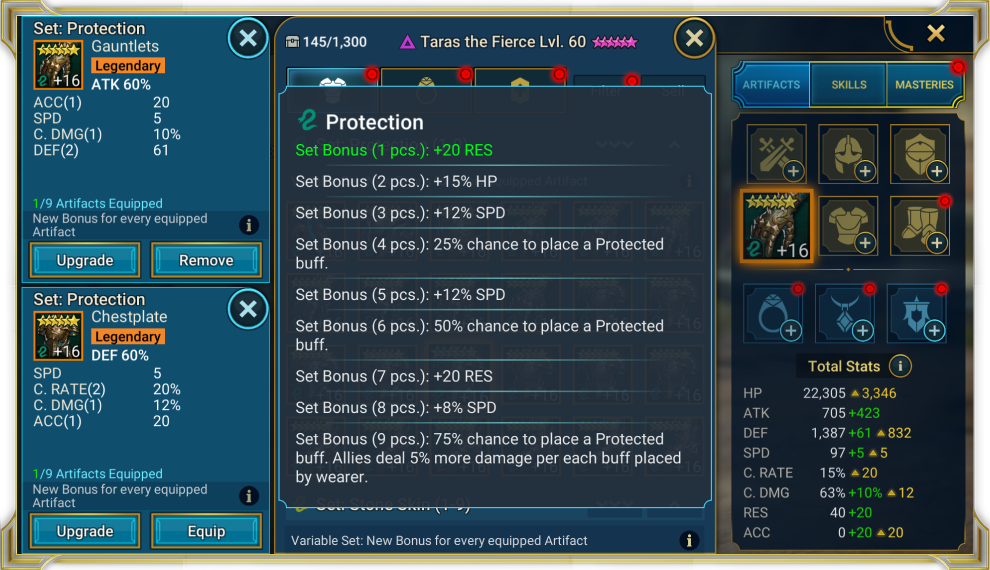 i
iSet Bonuses stack, and are additive, meaning 3 of the same Set will provide the wearer with 3 times as great an effect. For example: A single Life Set will provide a 15% HP bonus, whereas 3 Life Sets will grant a 45% HP bonus.
Artifact and Accessory Sets provide a range of bonuses:
- Basic Artifact Sets: provide Stat bonuses to the wearer’s Base Stats
- Advanced Artifact Sets: provide a range of effects, like skill modifications (such as a chance to place debuffs), or even behavior modifications (such as a chance to get an Extra Turn)
- Accessory Sets: provide a range of effects like skill modifications (such as preventing a skill going on cooldown after use) or even behavior modifications (such as a chance to counterattack when hit).
Note: All Stat-based bonuses from Basic Sets apply to the Champion’s Base Stats unless otherwise stated. For example: a Champion with 1,000 Base MAX HP has 1,500 actual HP due to currently equipped Artifacts. When another Artifact is equipped, its bonuses will apply to the 1,000 Base HP, not 1,500.
Rank and Rarity
Artifacts and Accessories come in different Ranks and Rarities that greatly affect their strength.
Rarity influences the number of Substats an Artifact/Accessory has at its base Level.
- The more Substats a piece of Gear starts with, the better its potential when fully upgraded.
The number of Substats a piece of Gear starts with are:
- Common Gear: 0 Substats
- Uncommon Gear: 1 Substat
- Rare Gear: 2 Substats
- Epic Gear: 3 Substats
- Legendary Gear: 4 Substats
- Mythical Gear: 4 Substats (One of the subtats will already be pre-upgraded.)
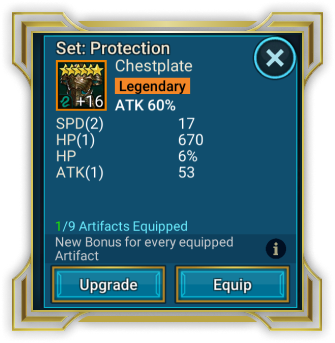 i
iRank influences the value of the Primary Stat and Substats.
- The higher the Rank of a piece of Gear, the greater the value of its Stats.
Gear's Rank and Rarity is innate, and will never change through upgrading.
When viewing a piece of Gear, you can see all its properties at a glance as follows:
 i
iSet Bonus Mechanics
Artifact Sets that have a chance to apply debuffs do so without taking the attacker’s ACC or the defender’s RES Stats into account. Buff Blocks and Passive Skills work as normal.
Multi-hit Skills have a single chance of applying debuffs to each target. If a Skill hits 3 times, you do not have 3 chances to apply the debuff.
Artifact Set debuffs and debuffs from a Champion’s Skills are two independent processes.
For example: A Champion has a Skill with a 50% chance of placing a [Stun] debuff and is equipped with a Stun Set of Artifacts that provides an 18% chance of placing a [Stun] debuff with each attack. Those two chances do not stack or add together.
When using the Skill in question, the Champion will not have a 68% chance of placing a [Stun] debuff. Instead, the game will calculate both chances independently – once for the 50% chance from the Skill, and once for the 18% chance from the Artifact Set.
Priority Stats Filter
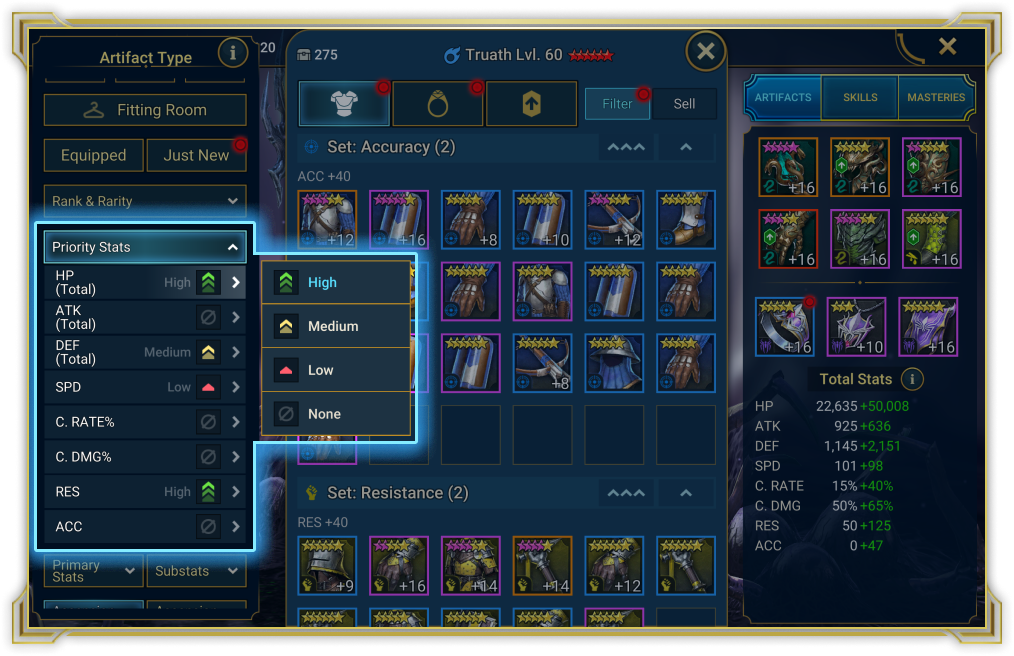
This Filter helps you to sort gear according to how you want to prioritize stats.
 i
iThere are 4 priority levels for stats:
- None (this is the default)
- Low
- Medium
- High
Note: the Filter counts both flat and % values for HP, ATK, and DEF, as well as primary stats and substats for all gear.
If you're looking for gear with a very specific stat and aren't worried about what Artifact Set it comes from, use the "Hide Set Filters" checkbox. Ticking this checkbox will show you the gear with the highest stats, regardless of the Artifact Set it's a part of.
Equipping and Upgrading Gear
Equipping
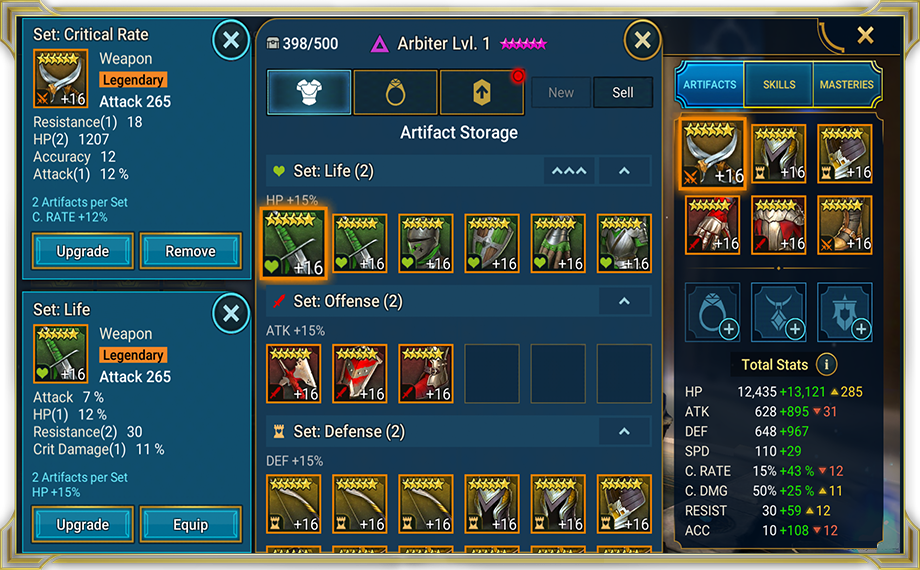
To equip a Champion with Gear, open your Champion Collection and select the Champion you want to equip.
Tap any Artifact/Accessory Slot to open the Artifact Storage or the Compatible Accessories pop-up.
 i
iFrom there you can view, compare, sort, sell, or equip any Gear you have in your Storage.
Previously equipped Gear can be unequipped or swapped out for another one, but you’ll need to pay a fee in Silver.
Upgrading
Every piece of Gear starts at Level 0 (without any upgrades), with a small Primary Stat, and between 1 and 4 Substats, depending on the Rarity.
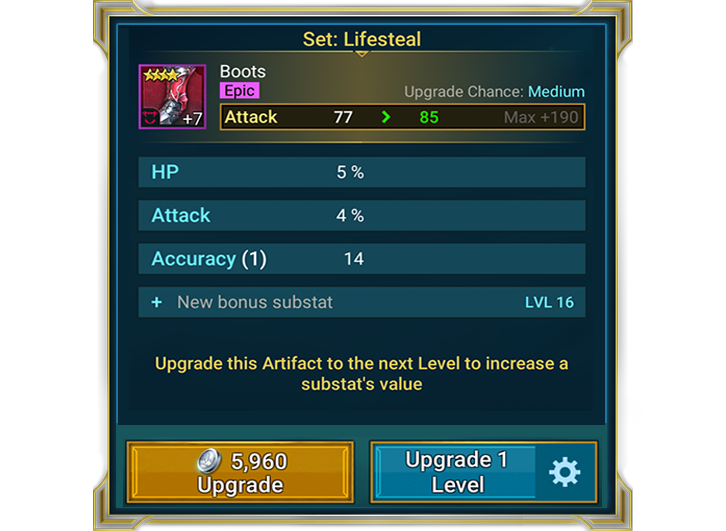
To increase your Gear's strength, you’ll need to upgrade it. Artifacts and Accessories can be upgraded to a maximum Level of 16.
Upgrading Gear does two things:
- Increases the value of its Primary Stat
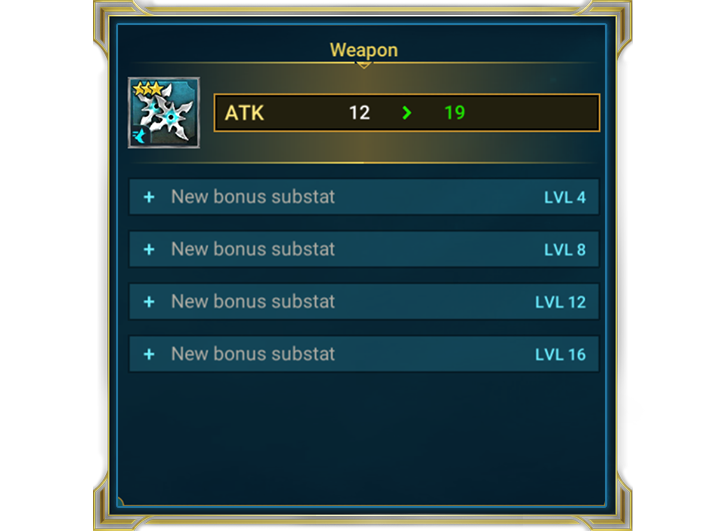
- At milestone Levels, it either upgrades an existing Substat (depending on how many are available), or unlocks a new Substat
Milestone levels are Levels 4, 8, 12, and 16, as shown below.
 i
iNote: Artifacts and Accessories are hard to upgrade, and won’t always upgrade on their first try every time. The probability of a piece of Gear successfully being upgraded decreases with each Level. However, the Silver spent on an attempted upgrade will be lost. Over time, this can be costly – so be picky when deciding what Gear to fully upgrade.
 i
iInstant Upgrading
It will instantly upgrade a chosen piece of Gear to the chosen level, skipping all the animations from each Artifact/Accessory upgrade attempt. Each level upgrade will still happen progressively (attempt by attempt) as usual, with the same Silver cost per attempt, and the exact same chance of success or failure as upgrading manually.
Silver will be instantly debited from your account as soon as you hit the "Upgrade" button, according to how many upgrade attempts it took for the process. If you don't have enough Silver, the process will end prematurely once you run out.
The option to skip all the animations unlocks at Level 40.
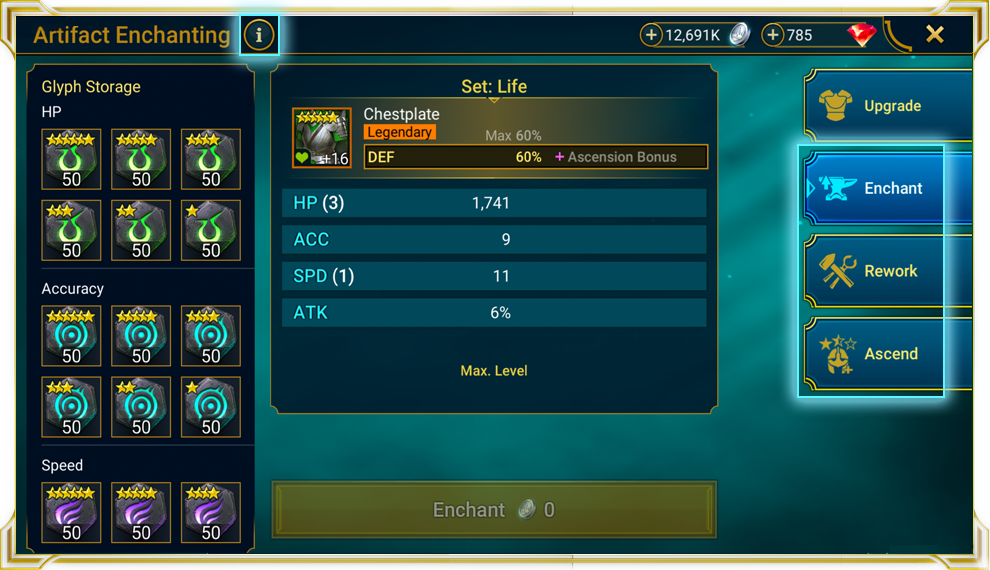
There are other ways to make Gear stronger. Enchanting allows you to Upgrade an Artifact or an Accessory's Substats via Glyphs. Reworking allows you to randomly change a piece of Gear’s Primary Stat and Substats. Ascending Gear grants it an Ascension Bonus; an extra stat that can be further upgraded via Ascension. For more details on each of these ways to upgrade Gear, hit the Info icons in their corresponding tabs.
 i
iObtaining Gear
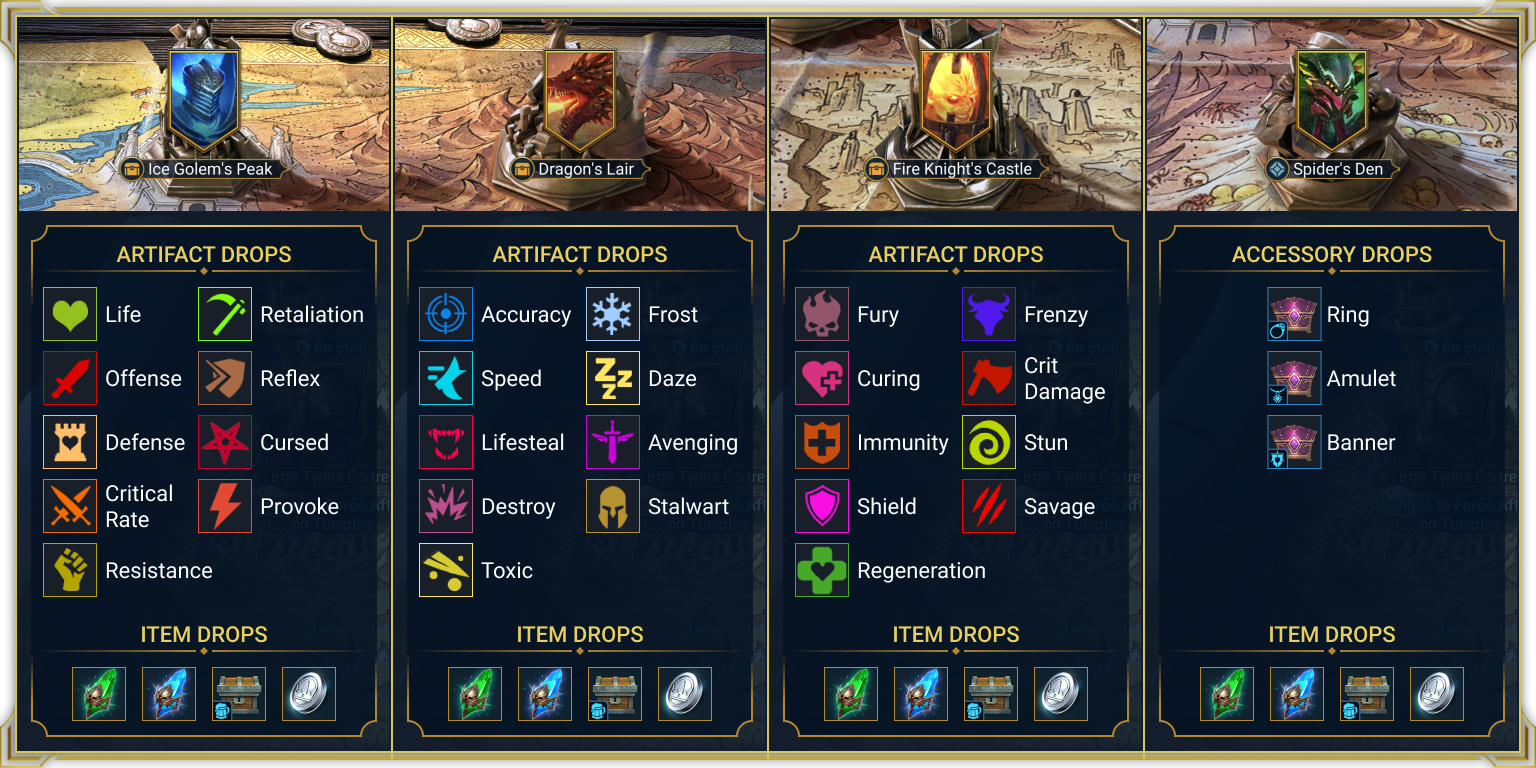
There are many ways to get Gear. You can get Accessories from the Spider's Den, from Stage 7 of the Brimstone Path, and as Daily Login Rewards. You can also win them in Events and Tournaments, as well as buy them in the Shop.
As for Artifacts, you mostly get them from Campaign Battles, Dungeon runs, and from crafting in the Forge. You can also get them at the Market, in the Doom Tower, in Arena Chests and Clan Boss Chests, and more. Also, you can win some Artifacts in Events and Tournaments.
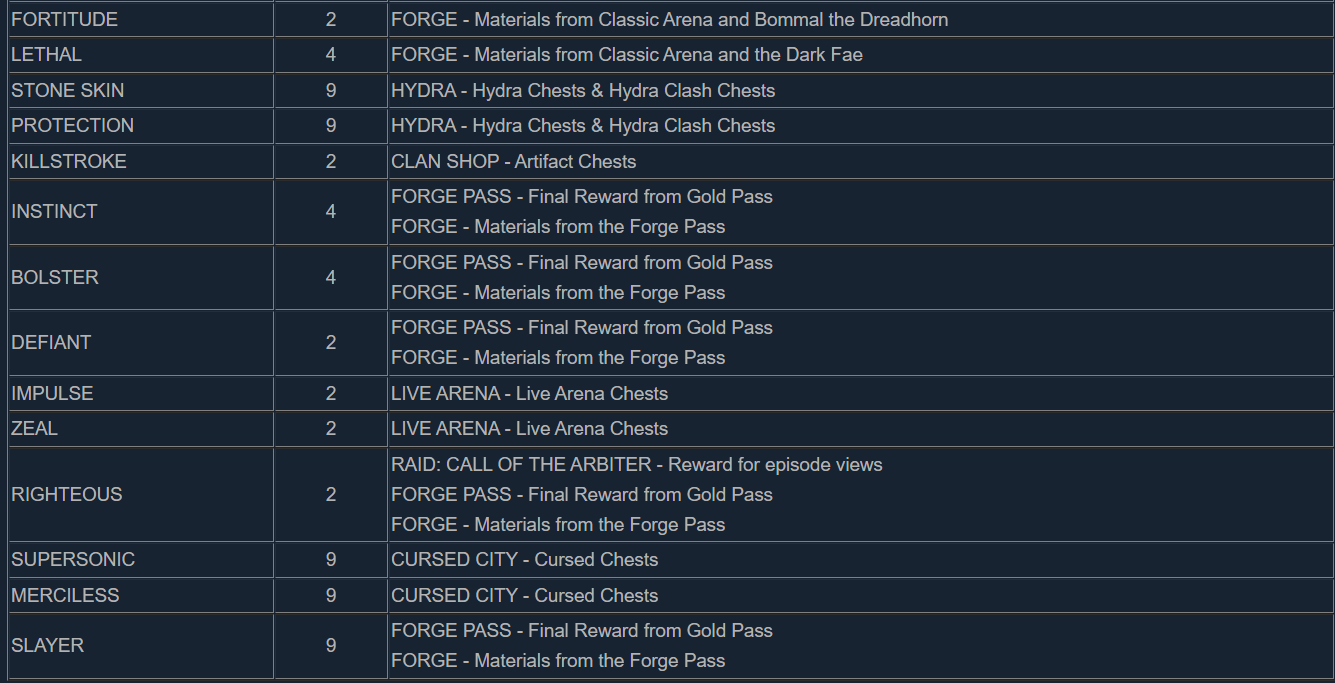
Here's a breakdown of where you can get each type of Artifact:
 i
iCampaign Battles
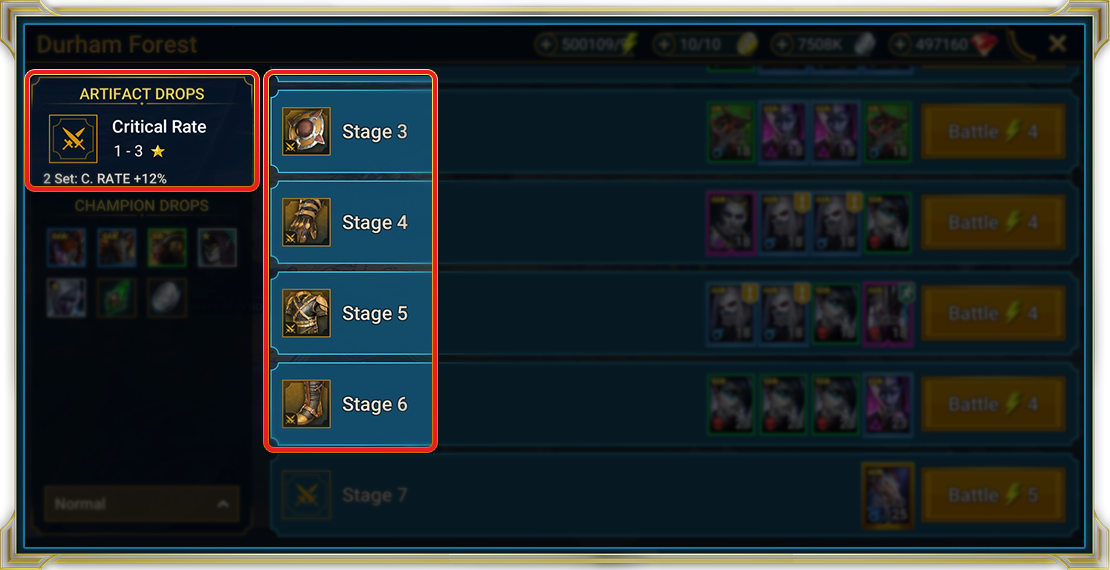
The Campaign lets you win beginner Gear for Champions and prepare them for greater challenges, such as the Dungeons.
Artifacts and Accessories found in the Campaign locations will be weaker than those found in the higher levels of the Dungeons, but a key advantage of the Campaign is being able to hunt for a specific piece of Gear, as each Stage only drops a certain kind. Accessories however, can only be found on Stage 7 of the Brimstone Path and only specific types of Accessory can be found there, depending on the current Campaign difficulty.
Gear Dungeons
When your Champions are strong enough, you can take them to the Gear Dungeons to hunt for Raid’s most powerful Gear.
Each Dungeon protects different Gear, so you’ll need to build teams for each one if you want to get your hands on the best Gear around.
The higher the floor of the Dungeon, the more powerful the Gear that can be found there.
Each Artifact Dungeon drops Artifacts at random from a specific pool of Artifact Sets. As for the Spider's Den, you can get Accessories for any Faction there.
Forge
The Forge lets you craft Artifacts using Materials you collect as you play.
You`ll get Materials from a variety of in-game activities - like Arena Battles, Faction Wars, Doom Tower, Events, and Tournaments.
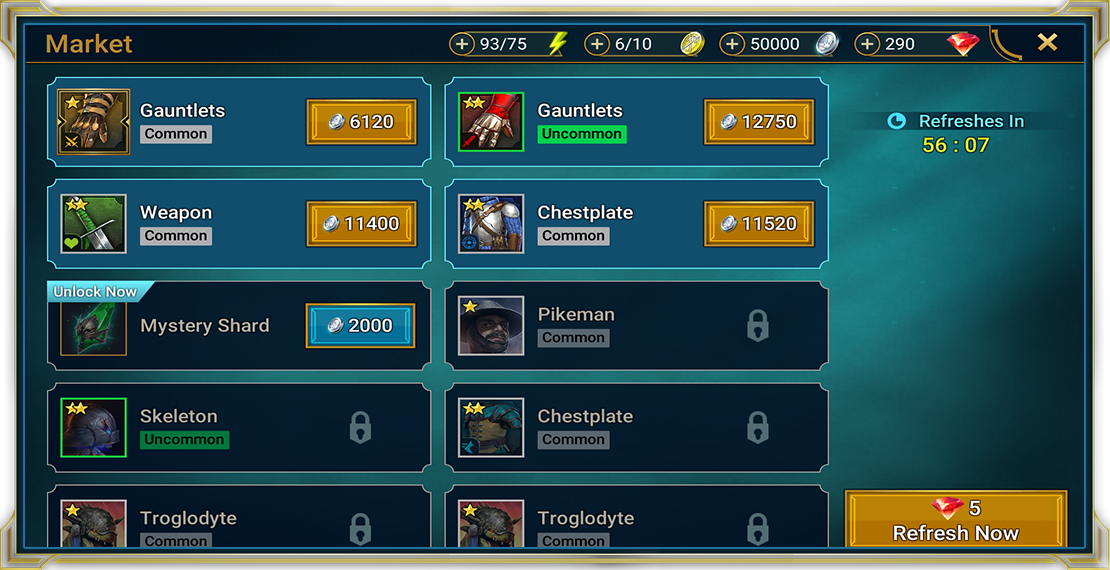
Market
The Market provides a regular influx of new items available to purchase with Silver.
Artifacts will often be available here. However, Artifacts at the Market are generated at random – and can be of varying Rank, Rarity, and Set.
It’s worth keeping an eye out for incredibly rare Artifacts from difficult Dungeons, but it can’t be depended on when you need something in particular.
Special Accessories
Certain Accessories also have Special Effects that can have a great impact on the wearer. The Special Effects from these Accessories stack if multiple Accessories of the same type are equipped. And like always, each Accessory has its own Rank, Rarity, and Faction.
These special Accessories can be found in various places throughout the game - such as Clan Boss Chests, the Tag Arena Bazaar, and as a reward in Clan vs Clan Tournaments:
Bazaar-exclusive Accessories
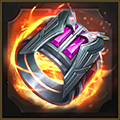
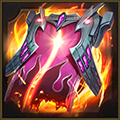
Cleansing Accessory - Has an 8% chance to remove 1 random debuff from the wearer each turn.



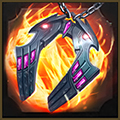
Refresh Accessory - Has a 5% chance to prevent a Skill going on cooldown after use.
CvC Tournament Accessories
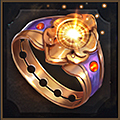
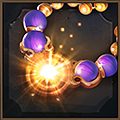
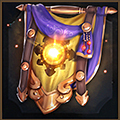
Bloodshield Accessory - Gives the wearer a Shield worth 5% of the damage dealt after attacking. (Gives the wearer a Shield worth 1.25% of the total damage deal instead when using AoE attacks. Won't give a Shield based on the damage from Warmaster or Giant Slayer Masteries.)
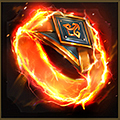
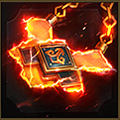
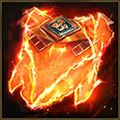
Reaction Accessory - Has a 25% chance to change critical hits into normal hits when the wearer is attacked before the first turn in each round.
Clan Shop Accessories
 i
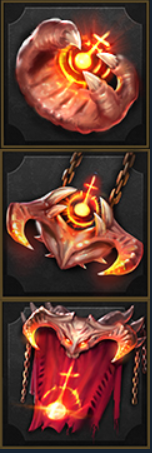
iRevenge Accessory - Has a 5% chance to Counterattack when hit.
Hydra Accessories
 i
iStone Skin Accessories - 1-3 pieces. Complements Stone Skin Artifacts.
 i
iProtection Set Accessories - 1-3 pieces. Complements Protection Artifacts.
Cursed City Accessories
 i
iSupersonic Accessories - 1-3 pieces. Complements Supersonic Artifacts.
 i
iMerciless Accessories - 1-3 pieces. Complements Merciless Artifacts.
Forge Pass Accessories
 i
iSlayer Accessories - 1-3 pieces. Complements Slayer Artifacts.
Artifact Sets
Below you can find a list of available Artifact Sets and their Set Bonuses, along with an explanation of the mechanics, and general guidelines for use.
Basic Sets

Life (2) – +15% HP. One of the simplest Artifact Sets, each completed Life Set provides the wearer with 15% extra HP on top of their Base Stats. Any Champion can benefit from extra HP, but keep an eye out for Champions that benefit specifically from more HP, such as those whose Skills are based on the Champion’s MAX HP.

Offense (2) – +15% ATK. Useful from early game to end-game, any Champions that focus on dealing damage will benefit from an Offense Set. However, some non-standard Champions may also benefit from Offense Sets, such as hybrid Champions who heal based on their ATK.

Defense (2) – +15% DEF. Primarily used to make a Champion harder to kill, a Defense Set is also incredibly strong on damage dealers whose Skills deal more damage based on their DEF.

Critical Rate (2) – +12% C. RATE. Almost universally useful, this Set is particularly strong on damage dealers, and those Champions that fight against high-HP targets, such as Bosses. It’s also a useful Set for those Champions whose Skills add extra effects upon landing as critical hits.

Accuracy (2) – +40 ACC. Accuracy is one of the most important Stats in the game for dealing with tricky Champions and Bosses. Equip your support Champions or debuffers with an Accuracy set to make sure they land their debuffs when it matters most.

Speed (2) – +12% SPD. The higher your Champion’s Speed Stat, the quicker their turn Meter fills up. Champions with the highest Speed Stat also get the first turn in battle. Getting the first turn in battle is often the deciding factor in who wins, especially when it comes to the Arena. Going first means a Champion can debuff the enemy, buff their own team, or even take out an enemy threat entirely.
Combine the importance of getting first turn with the fact that some Champions have Skills that benefit directly from extra SPD, and it’s easy to see why SPD sets are one of the most prevalent and important sets around.

Resistance (2) – +40 RESIST. Particularly useful for Champions who need to avoid debuffs at all costs, such as your primary healer, cleanser, or debuffer. A Resistance Set is always a good secondary Set to complement a main Set.

Crit Damage (2) – +20% C. DMG. When your damage dealers have a consistent Critical Rate, it’s time to start stacking on extra Critical Damage to increase their total damage output. It’s also a good choice for Champions whose Skills are guaranteed to crit.
Advanced Sets

Lifesteal (4) – Champions with this Set heal by 30% of the damage that they deal. One of the most useful sets around for farmers, or for Champions you want to have extra self-sustain in a battle. It’s also a good set to combine with Champions whose damage increases as they lose HP, allowing them to heal significant amounts and stay in the fight longer.
Lifesteal healing effects won't work with damage dealt by [Poison] debuffs.
However, if the wearer already has a Skill that heals based on the damage inflicted, both effects will apply, adding to the amount of HP recovered.

Destroy (4) – This Set decreases the target’s MAX HP by 40% of the damage dealt by the wearer. This is a good Set to counter tanky Champions with good self-sustain that usually heal themselves up to high HP before you’re able to take them down. This is because when fighting against a Destroy Set, each of their heals will be worth less.
When attacking with a Destroy Set, the target’s MAX HP cannot be decreased by more than 8% with each attack. The effect applies per Skill, not per hit, so multi-hit Skills accumulate and the HP destroyed is increased up to the 8% limit. Over the course of the battle, the target’s MAX HP cannot drop below 40% of the original value.

Retaliation (4) – Grants the Champion a 35% chance to Counterattack when attacked by an enemy. When counterattacking, the Champion will always use their default Skill, making this a good Set for Champions whose default Skill brings something useful or unique to the table. For example, this works especially well with Champions who bring some sort of crowd control (CC) in their Skill, such as [Provoke], [Stun], or [Freeze] debuffs, as it means any Champion who attacks them risks being taken out of play for a turn. It can be used with some tankier damage dealers, but it’s not a good Set for glass cannons or other easy-to-kill attackers, as the wearer benefits from being able to take a hit from the enemy.
When counterattacking, a Champion’s default Skill will inflict 65% of its standard damage.

Fury (4) – +5% Damage for every 10% HP lost. Stacks up to +25%. This Set increases the damage that the wearer inflicts according to their current HP. The lower their current HP, the higher the damage. A solid Set for tankier damage dealers and bruisers, it’s made for those that can deal out significant damage, but are also strong enough to take a couple of hits. A Fury Set is an especially good pairing on Champions that have [Taunt] or [Provoke], and any others who are likely to be targeted by the enemy team.
Try it in the Arena and give one of your Champion’s the extra boost they need to guarantee they take out an enemy target.

Curing (4) – Adds 20% Bonus Heal to all healing Skills used by the wearer. Note: This only works on Heals cast by the wearer of the Set, not on all Heals the wearer receives (unless cast by the wearer).

Reflex (4) – Grants the Champion a 40% chance to reduce the cooldown of one of their Skills by 1 Turn. The skill whose cooldown is reduced is completely random.
This Set benefits almost every Champion in the game, but is especially useful for Champions whose strongest Skills have long cooldowns.
This Set is most effective on Champions who have one default Skill, one active Skill, and one passive Skill. As default Skills and most passive Skills don’t have a cooldown, it means the Champion will always reduce the cooldown of their active Skill if the effect triggers.

Cursed (4) – Grants the Champion a 75% chance of applying a 50% [Heal Reduction] debuff for 2 turns when attacking. Particularly useful in the Arena when fighting against teams built around constant healing and sustain – those that try to beat your team slowly, but are difficult to kill themselves. Try equipping this Set on a Champion with multiple AoE skills to maximize its effectiveness.

Toxic (4) – Grants the Champion a 75% chance of applying a 2.5% [Poison] debuff for 2 turns when attacking. Poison damage – also known as damage over time (DoT) – is fixed to the target’s MAX HP, so this Set is useful for taking down high-HP targets such as bosses. Toxic is a good set to supplement skills that already have [Poison] debuffs to double down on their effectiveness.

Frost (4) – Grants the Champion a 20% chance of applying a [Freeze] debuff for 1 turn when attacked by an enemy Champion.
Contrary to most other Sets, the Frost Set applies a [Freeze] debuff when the wearer is attacked by an enemy, not when the wearer attacks someone else. This means the Set is best used on Champions who are natural targets for the enemy team, such as those with [Provoke] or [Taunt] debuffs. It makes every attack from an enemy Champion a risk.

Daze (4) – Grants the Champion a 25% chance of applying a [Sleep] debuff for 1 turn when attacking. Much like all crowd control debuffs, a Daze Set is useful on Champions with AoE skills. Sleep is different to other crowd control debuffs in that if a Champion under a [Sleep] debuff takes damage, they will lose the debuff. This means it’s often best to pair Champions wearing Daze Sets with others whose skills don’t do any direct damage, such as bombers.

Immunity (4) – Applies a [Block Debuffs] buff on the wearer for 2 turns at the start of every Round. This is especially powerful in the Arena to make sure your Champions aren’t taken out of the game with an enemy team’s crowd control Champions, such as those with [Stun] debuffs. The Immunity Set adds a lot of safety to your team if you’re not sure your team is fast enough to get the first turn in battle.

Avenging (4) – Grants the Champion a 45% chance to Counterattack when attacked by an enemy with a critical hit. Similar to the Retaliation Set, this set is best used on Champions with strong effects or debuffs on their default Skills.
However, unlike with the Retaliation Set, Champions wearing an Avenging Set will only counterattack when hit with a critical hit.

Shield (4) – Grants a [Shield] buff worth 30% of the wearer’s MAX HP to all allies for 3 turns at the start of each Round. This Set is one of the most powerful in all of Teleria, and is best equipped on Champions with high HP. It’s even better to equip multiple Champions in a team with Shield Sets, amplifying the Set’s effectiveness.
If multiple Champions on the same team have Shield Sets, the value of the [Shield] buff from the Artifact Sets will stack.
For example, if two Champions with 6,000 HP equip Shield Sets, the whole team will gain Shields worth 4,000 HP (2,000 + 2,000).
If a Champion then uses a skill that places a [Shield] buff, the Shield from the Skill will be shown as an additional buff, and will not replace or enhance the existing [Shield] buffs.

Stalwart (4) – Decreases incoming damage from AoE attacks on the wearer by 30%. This Set is potentially good as a reserve Set for your Dungeon Teams who have to deal with powerful AoE attacks from the Bosses.

Frenzy (4) – The wearer’s Turn Meter will increase by 10% for every 5% HP lost from each hit of an enemy attack.
This Set is incredibly useful in certain situations, such as when equipped by Champions who have a sort of recovery or “catch-up” Skill. For example, in Arena Defense – where attacking teams will usually try to weaken your Defense down with multiple AoE attacks – having your healer on a Frenzy Set will allow them to fill their Turn Meter faster than the next enemy champion’s, letting them heal your team, or even interrupt the enemy team’s turn order.
The effects from this Artifact Set are measured on a per-hit basis. This means that the wearer’s Turn Meter will only increase if a single hit causes them to lose at least 5% of their HP. However, each hit can increase the Turn Meter by more than 10%. For example, if a hit deals 10% of the Champion’s HP, the Turn Meter will increase by 20%. Each hit in multi-hit Skills is counted separately.
The effects of this Set won’t occur from HP lost from [Poison] debuffs, Skills that do self-damage, or other Skills that modify or balance Champion current or MAX HP.

Regeneration (4) – Heals the Champion by 15% of their MAX HP at the start of their turn. This is best used on Champions who are hard to take down, but pose significant threat to the enemy team. High HP and high DEF Champions will benefit most from a regular, passive heal. Equip them with a Healing Set to maximize their potential.
The heal is based on their actual MAX HP in the battle at the time, including all Great Hall Bonuses, and boosts from other sources.

Stun (4) – Grants the Champion an 18% chance of applying a [Stun] debuff for 1 turn when attacking. Stun Sets are best used on Champions with multiple AoE attacks to give them the highest chances of locking down an enemy Champion.
The [Stun] debuff is one of the strongest crowd control debuffs in the game, as targets with [Stun] debuffs can be attacked and targeted as normal (unlike with [Sleep] debuffs). This is especially powerful in the Arena, where every turn counts.

Relentless (4) – Grants the Champion an 18% chance of getting an Extra Turn immediately after their turn. Though heavily dependent on luck, this is an extremely powerful Artifact Set, and is a good fit for almost any Champion. If you have a support Champion – such as a buffer or debuffer – you usually want them to cycle their turns and use their Skills as often as possible. No other Set gives them this ability.
Combine it with Skills that also grant Extra Turns, and it becomes even more powerful, letting the wearer go multiple times and potentially heal their whole team – or even kill the enemy’s. There are countless ways to use and combine this Set with other Skills and effects – such as those that decrease Skill cooldowns – which rightfully makes it one of the most widely used Artifact Sets around.
Once an Extra Turn occurs, the chance of getting consecutive Extra Turns drops by 45% each time, as follows: 18% -> 9.9% -> 5.5%, and so on.

Savage (4) – Each attack from the wearer ignores 25% of the target Champion’s DEF when attacking. The total value of the attack will ignore 25% of the target’s DEF stat, greatly reducing damage mitigation from the defending Champion. This bonus stacks with other Ignore DEF Skills or effects a Champion may be benefiting from.
In short, this dramatically increases the damage output of the wearer, making it an excellent Set to equip on your damage dealers – especially when trying to kill a high-DEF target.

Taunting (4) – Grants the Champion a 30% chance of applying a [Provoke] debuff for 1 turn when attacking.
This Set is best equipped on Champions who are made to take hits, such as those with in-built Counterattack mechanics, those who get stronger the more damage or hits they take, or simply those Champions tanky enough to take the heat from softer Champions.
It provides good soft crowd control over enemy Champions. Although enemies with [Provoke] debuffs can attack, they will only be able to use their default Skills. Equipped on a Champion who counterattacks, this Set can lock down enemy Champions permanently, reapplying the [Provoke] debuff repeatedly.

Cruel (2) – ATK + 15%. Ignores 5% of enemy DEF.
Only available as a reward for fighting the Clan Boss (Demon Lord), the Cruel Artifact set is a mix of Offense (2) and Savage (4) Sets, both increasing the Attack power of the Champion wearing it, and granting them an additional damage boost via ignoring enemy Defense.

Immortal (2) – HP + 15%. Heals by 3% every turn.
Only available as a reward for fighting the Clan Boss (Demon Lord), the Immortal Artifact set is a mix of Life (2) and Regeneration (4) Sets. It works well for Champions that need to stay alive for as long as possible, both granting them a significant HP boost and healing them at the same time.

Divine Life (2) - HP + 15%. +15% HP Self Shield for 3 Turns.
Only available as a reward from Arena Chests, the Divine Life Set offers excellent survivability. Just like the Shield Set, the effect resets at the start of each Round.

Divine Offense (2) - ATK + 15%. +15% HP Self Shield for 3 Turns.
Only available as a reward from Arena Chests, the Divine Offense Set would be an excellent choice for any Attacker or other Champions that require a lot of ATK at the cost of DEF or HP. The Shield buff will allow them to survive longer and get into the fray, where they are most useful.

Divine Critical Rate (2) - C.Rate + 12%. +15% HP Self Shield for 3 Turns.
Only available as a reward from Arena Chests, the Divine Critical Rate Set offers the same benefits as Divine Offense, but, in general. presents a perfect choice to any Champion that needs higher C.Rate.

Divine Speed (2) - SPD + 12%. +15% HP Self Shield for 3 Turns.
Only available as a reward from Arena Chests, the Divine Speed Set allows the best two worlds - increased Speed and Shield that gives your Champions the means to survive for longer.

Swift Parry (4) - SPD +18%. C. DMG +30%. 50% chance of Unkillable when hit with fatal hit. Occurs once per Round.
The Swift Parry Set is an excellent hybrid Set. It boosts Speed and Critical Damage, and also gives the wearer a chance of getting an Unkillable buff and surviving an attack that would have otherwise killed them.

Deflection (4) - HP +20%. DEF +20%. 25% chance to deflect 1 debuff onto attacker.
The Deflection Set will make your enemies regret ever attacking you. Whenever an enemy tries to place a debuff on the Set's wearer, there is a 25% chance of deflecting it back onto the attacker instead. It also increases HP and DEF.

Resilience (2) - HP +10%. DEF +10%. Increases both HP and DEF.
A well-balanced second Set to give your Champions some extra staying power.

Perception (2) - ACC +40. SPD +5%.
Increases Accuracy and Speed. Lets you go first and land your most important debuffs.

Fatal (2) - ATK +15%. C. RATE +5%.
The perfect second Set to give your attackers an extra stat boost.

Untouchable (4) - Immunity for 2 turns. RESIST +40.
Gives the wearer 2-turn immunity to debuffs with a [Block Debuffs] buff, as well as making it harder for the enemy team to remove the buff with a handy RES boost. Useful everywhere, especially in the Arena.

Affinitybreaker (4) - C. DMG +30%. 20% chance to change weak hit into critical hit.
Helps negate the risk when taking a Champion into a fight against a stronger Affinity. One of the strongest and most unique Sets around.

Frostbite (2) - 15% chance to block Freeze debuffs. 10% chance to place Freeze debuff on attacker.
Can prevent a Champion from getting frozen and has a chance to place a [Freeze] debuff on the attacker whenever they hit the wearer. Makes the opponent think twice about attacking you.

Guardian (4) - Wearer absorbs 10% of all damage dealt to ally Champions. Heals by 10% every turn.
This Set acts like a passive Ally Protection buff, while also healing the wearer - so make sure to equip your strongest tanks with it.

Bloodthirst (4) - C. RATE +12%. Heals by 30% of damage dealt.
Increases the wearer's Critical Rate by 12%. The wearer also heals by 30% of the damage they deal on every hit.
A new take on the all-time favorite Lifesteal set.
Bloodthirst healing effects won't work with damage dealt by [Poison] debuffs.
However, if the wearer already has a Skill that heals based on the damage inflicted, both effects will work, increasing the amount of HP recovered.
 i
iFortitude (2) - RES +40. DEF +10%.
Increases the wearer's Resistance by 40 and Defense by 10%.
The perfect way to take your tanks to the next level.
 i
iLethal (4) - C. RATE +10%. Ignores 25% of enemy DEF.
Increases the wearer's Critical Rate by 10%. The wearer will also ignore 25% of the enemy's Defense.
Lethal lives up to its name, turning your Champions into deadly weapons.
 i
iKillstroke (2) - C. DMG +20%, SPD +5%.
Beefs up your damage dealers and makes sure they get a chance to do what they do best - hurt your enemies.
Demon Lord Sets
 i
iCruel (2) – ATK + 15%. Ignores 5% of enemy DEF.
Only available as a reward for fighting the Demon Lord, the Cruel Artifact set is a mix of Offense (2) and Savage (4) Sets, both increasing the Attack power of the Champion wearing it, and granting them an additional damage boost via ignoring enemy Defense.
 i
iImmortal (2) – HP + 15%. Heals by 3% every turn.
Only available as a reward for fighting the Demon Lord, the Immortal Artifact set is a mix of Life (2) and Regeneration (4) Sets. It works well for Champions that need to stay alive for as long as possible, both granting them a significant HP boost and healing them at the same time.
Hydra Sets
Stone Skin and Protection Gear drops from Hydra Chests and Hydra Clash Chests. They are both Variable Sets, meaning that you will gain extra bonuses depending on how many of them you equip. Also, both are available in Mythical Rarity, which is even rarer - and stronger - than Legendary.
 i
iStone Skin (9) – Variable Set. Equip 1-9 pieces for: +80 RES; +16% HP; +30% DEF; Stone Skin buff for 2 turns at the start of the Round (50% chance of blocking removals or steals, increased Stone Skin Shield value at 9th piece).
The Stone Skin buff removes all debuffs from the recipient and makes them immune to all debuffs except Bombs and HP Burn. It also decreases all damage received by 85%. Except for Bombs, which deal triple damage, and HP Burn which deals quintuple damage while the buff is active. If you damage a Champion with Stone Skin by 50% of the Champion’s MAX HP while the buff is active, they’ll lose the buff. If a target is under Stoneskin, HP Burn damages the target for 15% of their MAX HP, and damages their allies for 3% of their MAX HP. If there are 2 or more targets under Stoneskin, HP Burn deals damage for 15% of the MAX HP of all targets under Stoneskin, and 3% of the MAX HP of any allies not under Stoneskin.
 i
iProtection (9) – Variable Set. Equip 1-9 pieces for: +40 RES; +15% HP; +32% SPD; 75% chance of Protecting buffs cast by wearer, allies deal 5% more damage for each active buff placed on them by wearer.
Protected buffs cannot be stolen or removed in any way. Protected buffs will be indicated by a yellow border in battle.
Cursed City Sets
 i
iSupersonic (9) – Variable Set. Equip 1-9 pieces for: +15% HP, +40 RES, +32% SPD, 2% Turn Meter increase per each buff placed on each enemy, 30% reduction on Decrease Turn Meter effects against this Champion, 30% increase to Fill Turn Meter effects cast by the wearer.
 i
iMerciless (9) – Variable Set. Equip 1-9 pieces for: +25% ATK, +30% C.DMG, +10% SPD, 30% chance to decrease a random Skill's cooldown by 1 turn when dealing damage, +35% Ignore DEF, 15% chance of getting an Extra Turn.
Forge Pass Sets
 i
iInstinct (4) - SPD +12%. Ignores 20% of enemy DEF.
Only available from the Forge Pass. This set gives your Champions a speed boost, while making each of their attacks ignore 20% of their target's DEF. Incredibly powerful in the right hands.
 i
iBolster (4) - Protected 30% HP Ally Shield for 3 Turns. Heals wearer by 10% every turn.
Only available from the Forge Pass. This set places a protected Shield buff on you and your allies, meaning it cannot be stolen or removed in any way. You'll have to get rid of the Shield by either damaging it, or waiting for it to expire. Also, it heals the wearer by 10% of their MAX HP each turn - talk about bolstering your defenses!
 i
iDefiant (2) - DEF +10%. -15% Damage taken from enemy AoE attacks.
Only available from the Forge Pass. This tanky set increases your Champion’s Defense by 10% and decreases the damage they take from AoE attacks by a whole 15%. Think of it like the Stalwart (4) and Defense (2) Sets smashed together into one!
 i
iRighteous (2) - SPD +10%, RESIST +40.
Only available from the Forge Pass or when a RAID: Call of the Arbiter episode reaches a set number of views on YouTube. A perfect set for those who want to simultaneously speed up their Champions and increase their ability to resist debuffs.
 i
iSlayer (9) – Variable Set. Equip 1-9 pieces for: +15% C. RATE; +30% C. DMG; +10% SPD; 5% Turn Meter increase per each enemy hit by AoE attacks; ignores 30% of enemy DEF when using AoE skills; +30% chance to repeat damage dealt by AoE skills (the amount of the repeated damage is equal to the initial damage multiplier, the repeаted hit is always a normal hit and deals pure damage).
Only available from the Forge Pass.


